Fractals with characters

The first fractal-text association sample I saw was a fractal image created by Stephen C. Ferguson to which he added a mathematical expression (a fractal formula). Shortly after that, Terry Wright took it a step further, adding a complete poem over one of his images, thus starting his now-famous fractal poems. After seeing these two examples, I wondered how difficult it would be to convert a fractal image into plain ASCII characters (after all, language has fractal characteristics too).
As can be imagined, preserving a fractal image using character strings proved to be very difficult by hand. After some frustrating attempts to redraw one of my own fractal images into ASCII art, I searched through various software collections (this was back in 1999) and found a small freeware application called ASCIIPic, which could do the job in a “flash”. This application selects a predefined character based on the shades of an image and automatically traces its pattern to an ASCII file output. Once the task is complete, it’s just a matter of using “find and replace” to swap certain characters, making it closer to real ASCII art or choosing a different character that looks better to the eye.
Soon, I began adding HTML coding to assign colors to the images and publish them online. In a sense, that made the files less “complex” since a single character could now be used to trace the entire picture. However, it also transformed them from simple text files (6 Kb average size) into a bitmap-like equivalents (115 Kb or more). Later, I incorporated some graphic elements to make the ASCII pictures a bit more “artistic”, and even toyed with the idea of adapting sentences and short poems to the fractal patterns.
As of 2017, ASCIIPic is still available for download —same version, no changes. There are also online apps that can perform the same task: they convert any picture into ASCII art and generate the corresponding code in either HTML or TXT format. Use your favorite search engine to find them.
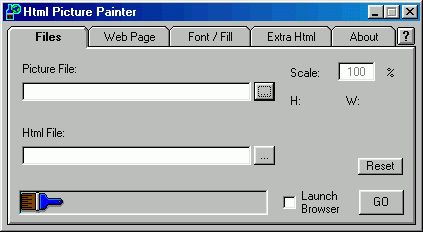
After exploring ASCIIPic, I found another bitmap-to-ASCII converter that performs the coloring process I previosly attempted using HTML coding only much faster. It directly converts the ASCII file into an HTML one, eliminating the need to code by hand. It’s called HTML Picture Painter, and it’s still available online in old software repositories, as it hasn’t been updated since the turn of the century.
How it works
To produce an acceptable-size ASCII file with ASCIIPic or HTML Picture Painter, the image should not exceed 100×100 pixels. Otherwise, the resulting ASCII art will span several 640×480 resolution screens. In ASCIIPic you can specify the output size (though the code will remain essentially the same). Don’t worry about the image’s appearance: ASCII art will never match the original image’s resolution or complexity. Also, if you want to see the ASCII nature of the picture, the characters, by default, should be no smaller than 6 points or so.
Take care of the image’s aspect ratio is even more important. ASCIIPic and other similar programs I have tried often struggle to preserve the original proportions. To maintain it, you’ll need to adjust the image’s proportions in a graphics editor before using ASCIIPic. Of course, it’s a matter of trial-and-error until you’re satisfied with the results.
Let’s put what we discussed into practice. The process takes a few seconds, and a few simple steps. Start by selecting your fractal picture, then reduce its size to 100×100 pixels using any graphics editor. Be sure to deactivate the “Maintain Aspect Ratio” option for non-square images. Although not strickly required, doing so can be helpful sometimes. Make sure that none of the image’s dimensions exceed 100 pixels.
For this exercise, we’re going to use ASCIIPic, so make sure to save the miniature image in BMP format because ASCIIPic only supports BMP files. When running the program, you’ll see the interface shown in Figure 1. Click the INPUT button to load your image, then click OUTPUT to name your test and select a folder where you want to store the *.txt file.
ASCIIPic has several options you can adjust to alter the results. In fact, you can skip the image reduction step mentioned above by selecting a lower zoom percentage under the OPTIONS tab. By default, it’s set to 100%.
The BRIGHTNESS control affect the characters used to render the picture. Increasing the brightness will select less dense or bulky characters (with more white space around them), giving the ASCII image “lighter” appearance. Conversely, lowering the brightness will result in denser, bulkier characters being used, making the image appear heavier or darker overall.
Finally, if you want to create an ASCII gallery with thumbnails, it’s pretty obvious that a thumbnail-sized ASCII version would amount to little more than an incoherent jumble of Xs and Ms. What I have done instead is take a screenshot of a maximized Notepad window displaying the ASCII image, then importing that into a graphics editor (I use XNView, which is pretty good, or Paint Shop Pro) to shrink it to the desired size. Alternatively, it’s also possible to open the text file in a word processor and reduce the font size —let’s say, to 4 points— for a similar effect.


And that’s pretty much the “technique”. Have fun!
Revised on 2025 April 18 for clarity.


